Monday, August 31, 2020
Thursday, August 6, 2020
Outfitting a Camper Shell as a Micro Camper
Here it is. An ARE MX camper shell to fit my 2009 F150 with an 8 foot bed.
Above: I alternated the seams in the ply and the foam.
It doesn't have to be perfect. Here is a cherry picked photo.
I glued it all together using Titebond II. I have no idea if I used the right adhesive, but Titebond has a good track record.
This is the largest compartment in the rear. I'm thinking a food locker.
Electrical up front, in here.
This TV has an internal rechargeable battery, allowing me to charge it when the Auxiliary battery is at 100% State Of Charge.
The color matches my truck.
The front skylight window is not functional. It's not cut out inside. No idea why ARE does this.
Big half slider windows with bug screen and pet screens.
The front skylight window is not functional. It's not cut out inside. No idea why ARE does this.
Big half slider windows with bug screen and pet screens.
I don't need the pet screen, but this shell was ordered by someone else, and never delivered.
I got it at a discount, so pet screens it is.
These mounts are glued on to avoid any holes in the honey comb portion of the top of the camper shell.
These mounts are glued on to avoid any holes in the honey comb portion of the top of the camper shell.
The only hole required is to pass the wires thru. This hole is a couple inches in front of that honeycomb bracing.
The brackets are made of high density polymer from MEGSUM, and attached using Silkaflex 221 Adhesive.
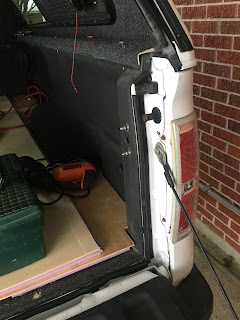
I'm concerned about the wires being abraded by the bottom of the panel frame at this point. I'll do something to try to avoid that.
I'm concerned about the wires being abraded by the bottom of the panel frame at this point. I'll do something to try to avoid that.
8/20/2020
First day I had left the solar panel on the camper shell, and it hailed.
No damage at all.
Ordered electrical components
Smart Battery Isolator
Thicker welding wire for the run from the battery.
Short ground strap
Wire Lugs
Fuse panel box
150A main fuses X 2
LED lights
and more.
The Shell is scheduled to be installed on the truck on Tuesday the 24th of August.
I need to remove the homemade bed cover.
Remove the installed ladder rack.
Once the top is on I need to install determine where the electrical is going to enter the bed.
Install the floor. 1/2" Dow Foam Board topped with 3/8 sheathing from out in the shed.
A piece of sheet-goods should cover the plywood.
Sub-Floor
9/16/20
Above:Here I am scribing 1/2" foam board to fit the contours of the bed. Each side was different.
Above: I scribed in 1/4" hardwood subfloor ply.Above: I alternated the seams in the ply and the foam.
It doesn't have to be perfect. Here is a cherry picked photo.
I glued it all together using Titebond II. I have no idea if I used the right adhesive, but Titebond has a good track record.
A few tool boxes are weighting it all down.
9/17/20
Today I did a thing.
9/18/20
It's a Friday, so I kept it simple.
9/19/2020
Began Work On The Bed
9/22/20
I cut the top of the bed, and installed the hinges.
Making sure the Ice Chest fits. There's a bit of room to grow. I need to figure out how to secure it.
This is the largest compartment in the rear. I'm thinking a food locker.
Where it's not finished in the rear, it will step down to 11" high. That will be where the stove goes.
Electrical up front, in here.
Some Electrical Work
in the electrical hold
Also connected the alternator to the aux battery for the first time.
I can charge from the alternator with the turn of that big red switch on the left.
The kind of stuff I'll eat daily.
Got to store the Mac & Cheese boxes so mice can't get in them.
10/03/2020
This TV has an internal rechargeable battery, allowing me to charge it when the Auxiliary battery is at 100% State Of Charge.
It also has an HDMI input.
That will allow me to use my Amazon Fire Stick.
I can cast my IPhone to the Fire Stick, and display it on the 14" TV, allowing me to stream Netflix, Prime, YouTube and more from a cell signal.
10/15/2020
I've added 'flooring', which is just carpet runner from Home Depot cut to fit and stapled to the subfloor.
I've also purchased Refletix Insulation. Cut it to fit the windows, and used a mile of Velcro to make it seal in all of the light.
My mattress has arrived, and it fits the bed well.
I'm happy with that.
Next week I'll order the Porta-Potty.
With that purchase, I'll be ready for a trial run.
10/18/20
Spent the night in the truck at a rest area.
No power issues.
Plastic ammo cans for food storage.
09/23/21
I've added refrigeration to the set up, replacing the cooler with a
SetPower 35TC.
A 37 Quart 12V refrigerator/freezer.
I still have not decided if I need to add solar and battery storage capacity.
Subscribe to:
Comments (Atom)


